Creating a custom GPT-2 Slack Bot with RunwayML’s hosted models.

The latest release of RunwayML includes an exciting new feature to host machine learning models online and connect to them anytime, anywhere, via a unique URL. This is a powerful option to interact with models in all sorts of different ways without requiring RunwayML to be open!
In this short 3 step tutorial, we’ll train a custom version of Open AI’s GPT-2 — a popular language model that generates coherent paragraphs of text — and create a bot we’ll integrate directly into our Slack workspace!
Here’s what we’ll need:
- RunwayML 0.12.0+
- A Slack Workspace
- A text dataset to train our model (Optional)
- A Glitch account (Optional)
Let’s get started!
Step 1: Train your own GPT-2 Model in RunwayML
The first thing we’ll do is to train a custom version of GPT-2 with RunwayML. You can also use one of the pre-trained models available and skip directly to Step 2 if you’d like.
To get started, open Runway and choose “Training”.
Next, click on “Train a New Text Model”. Choose a new name for your model and click “Create”. After that, upload the text dataset you want to use to train the GPT-2 model. Choose wisely! The model will learn to imitate and understand the text patterns or writing style in that document. (Note: the file must be a plain .txt document)

Once you have selected a dataset, click “Next” to configure and set your training options. In this case, we’ll go with 3000 steps, a medium initial checkpoint and we’ll add a custom prompt. The model will use this prompt to generate samples when training. To learn more about how to configure your training options, check out this link.
Ready to go? Click “Start Training” to start training our model.

Training might take a few hours depending on the options you selected during setup. You can monitor your session and check to see how the model is performing during the training phase. You can also close the app and come to it later. Runway will send you an email once the model is ready.
Step 2: Host your model online
Once the model is ready, we can deploy it to a custom hosted endpoint in just 2 clicks! Click over the model and select “Host Model”. This will bring up a popup to configure our hosted model. We’ll go with the defaults and click “Host Model”. (To learn more about hosted models, check out this guide)

✨Pro tip ✨: you can manage all your hosted models from the new hosted models dashboard 👇

Step 3: Create your Bot 🤖
The last step will be to create our Slack bot using our new hosted models. We’ll use a simple Node.js server to connect Slack to our GPT-2 model. First, we’ll start by setting up our server and then create a new Slack App.
The Server
To create a simple server to send our Slack messages to our GPT-2 model, we’ll use Glitch. (but you can use any server option you like). Glitch is a great way of creating web apps and servers easily. You can find the sample code for this project, and remix it, in the following link: https://glitch.com/~gpt2-slack-bot
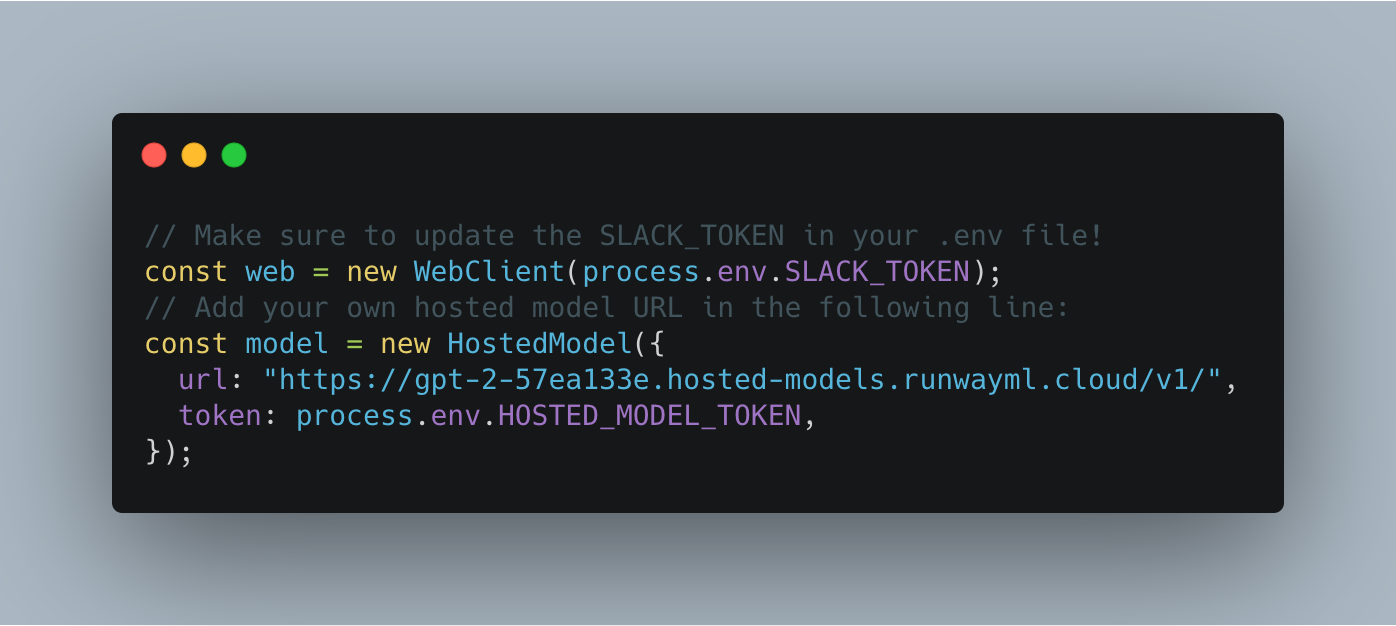
Remixing the code should provide you with everything you need! You’ll just need to change your model URL and credentials. Copy the URL RunwayML provided you when you hosted the model and paste that in the server.js file. Also, if your model is private, copy the Access Token and paste it as the HOSTED_MODEL_TOKEN variable in the .env file in your Glitch App.
Next, go ahead and copy the name URL of your Glitch app by clicking the “Share” button on Glitch and selecting “Live App”.Keep this URL around, we’ll need it for our Slack configuration coming up next. (The URL should have a name similar to https://indigo-dorian-gold.glitch.me)
The Slack App
- Visit api.slack.com/apps and click “Create New App”. Next, add a name and select a workspace for your app.
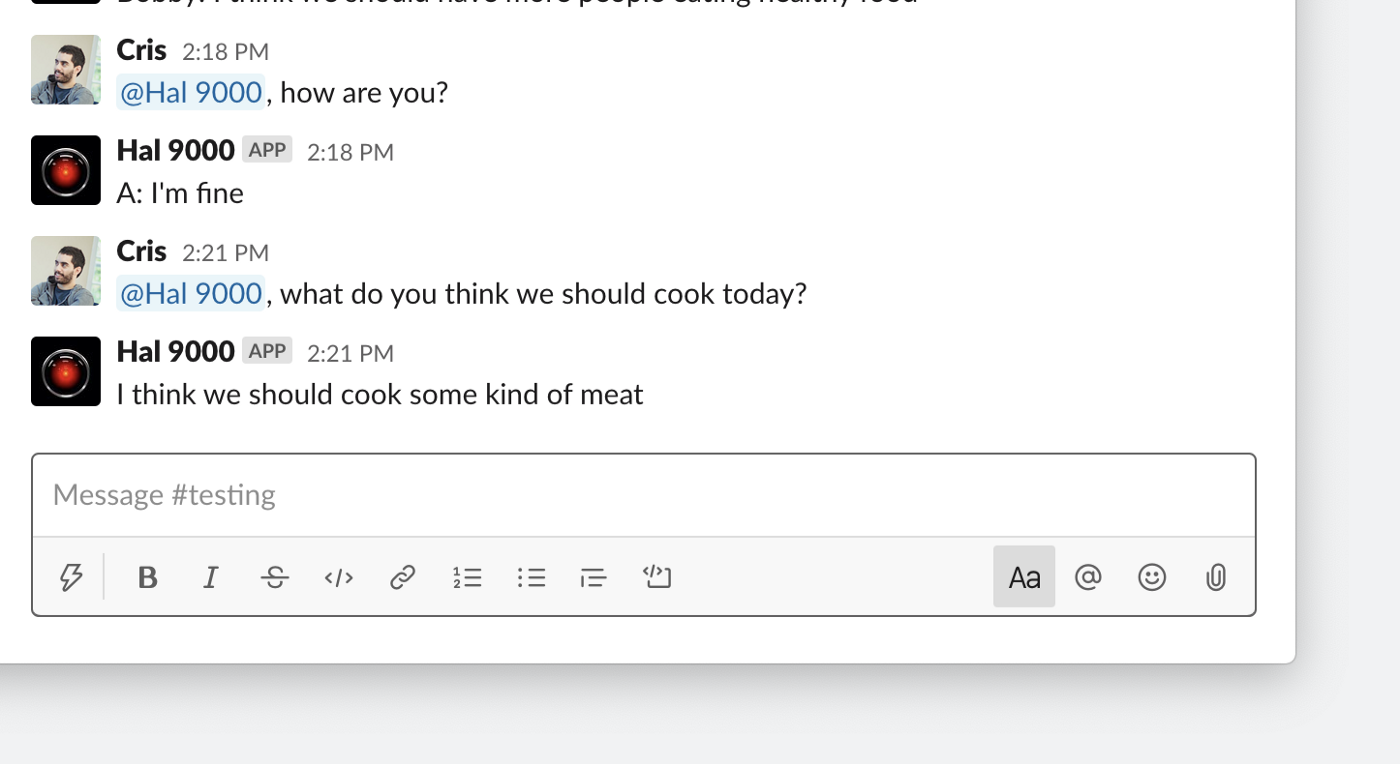
- Update your app display Information, name, and icon. I named mine Hal 9000 (Sorry, Dave), but if you used the Jeopardy dataset or a custom name, something else might be appropriate.
- Click “Event Subscriptions” in the left menu bar. In the Request URL space, add the Glitch URL from the previous part. Next, and on the same view, click under “Subscribe to bot events” and choose “app_mention”. This event subscription configuration will allow our Slack workspace to connect and communicate with our Glitch app every time someone mentions the bot. After verifying the URL and subscribing the bot to the app_mention event, you should see the following:

-
Next, click “OAuth & Permissions” in the left menu bar and click “Install App to Workspace”. Once installed, copy the Bot User OAuth Access Token and paste it as the SLACK_TOKEN variable in the .env file in your Glitch App.
-
In “OAuth & Permissions”, go to “Scopes” and click “Add an OAuth Scope” and choose chat:write. You will then need to reinstall the app, just click “Reinstall App” at the top.
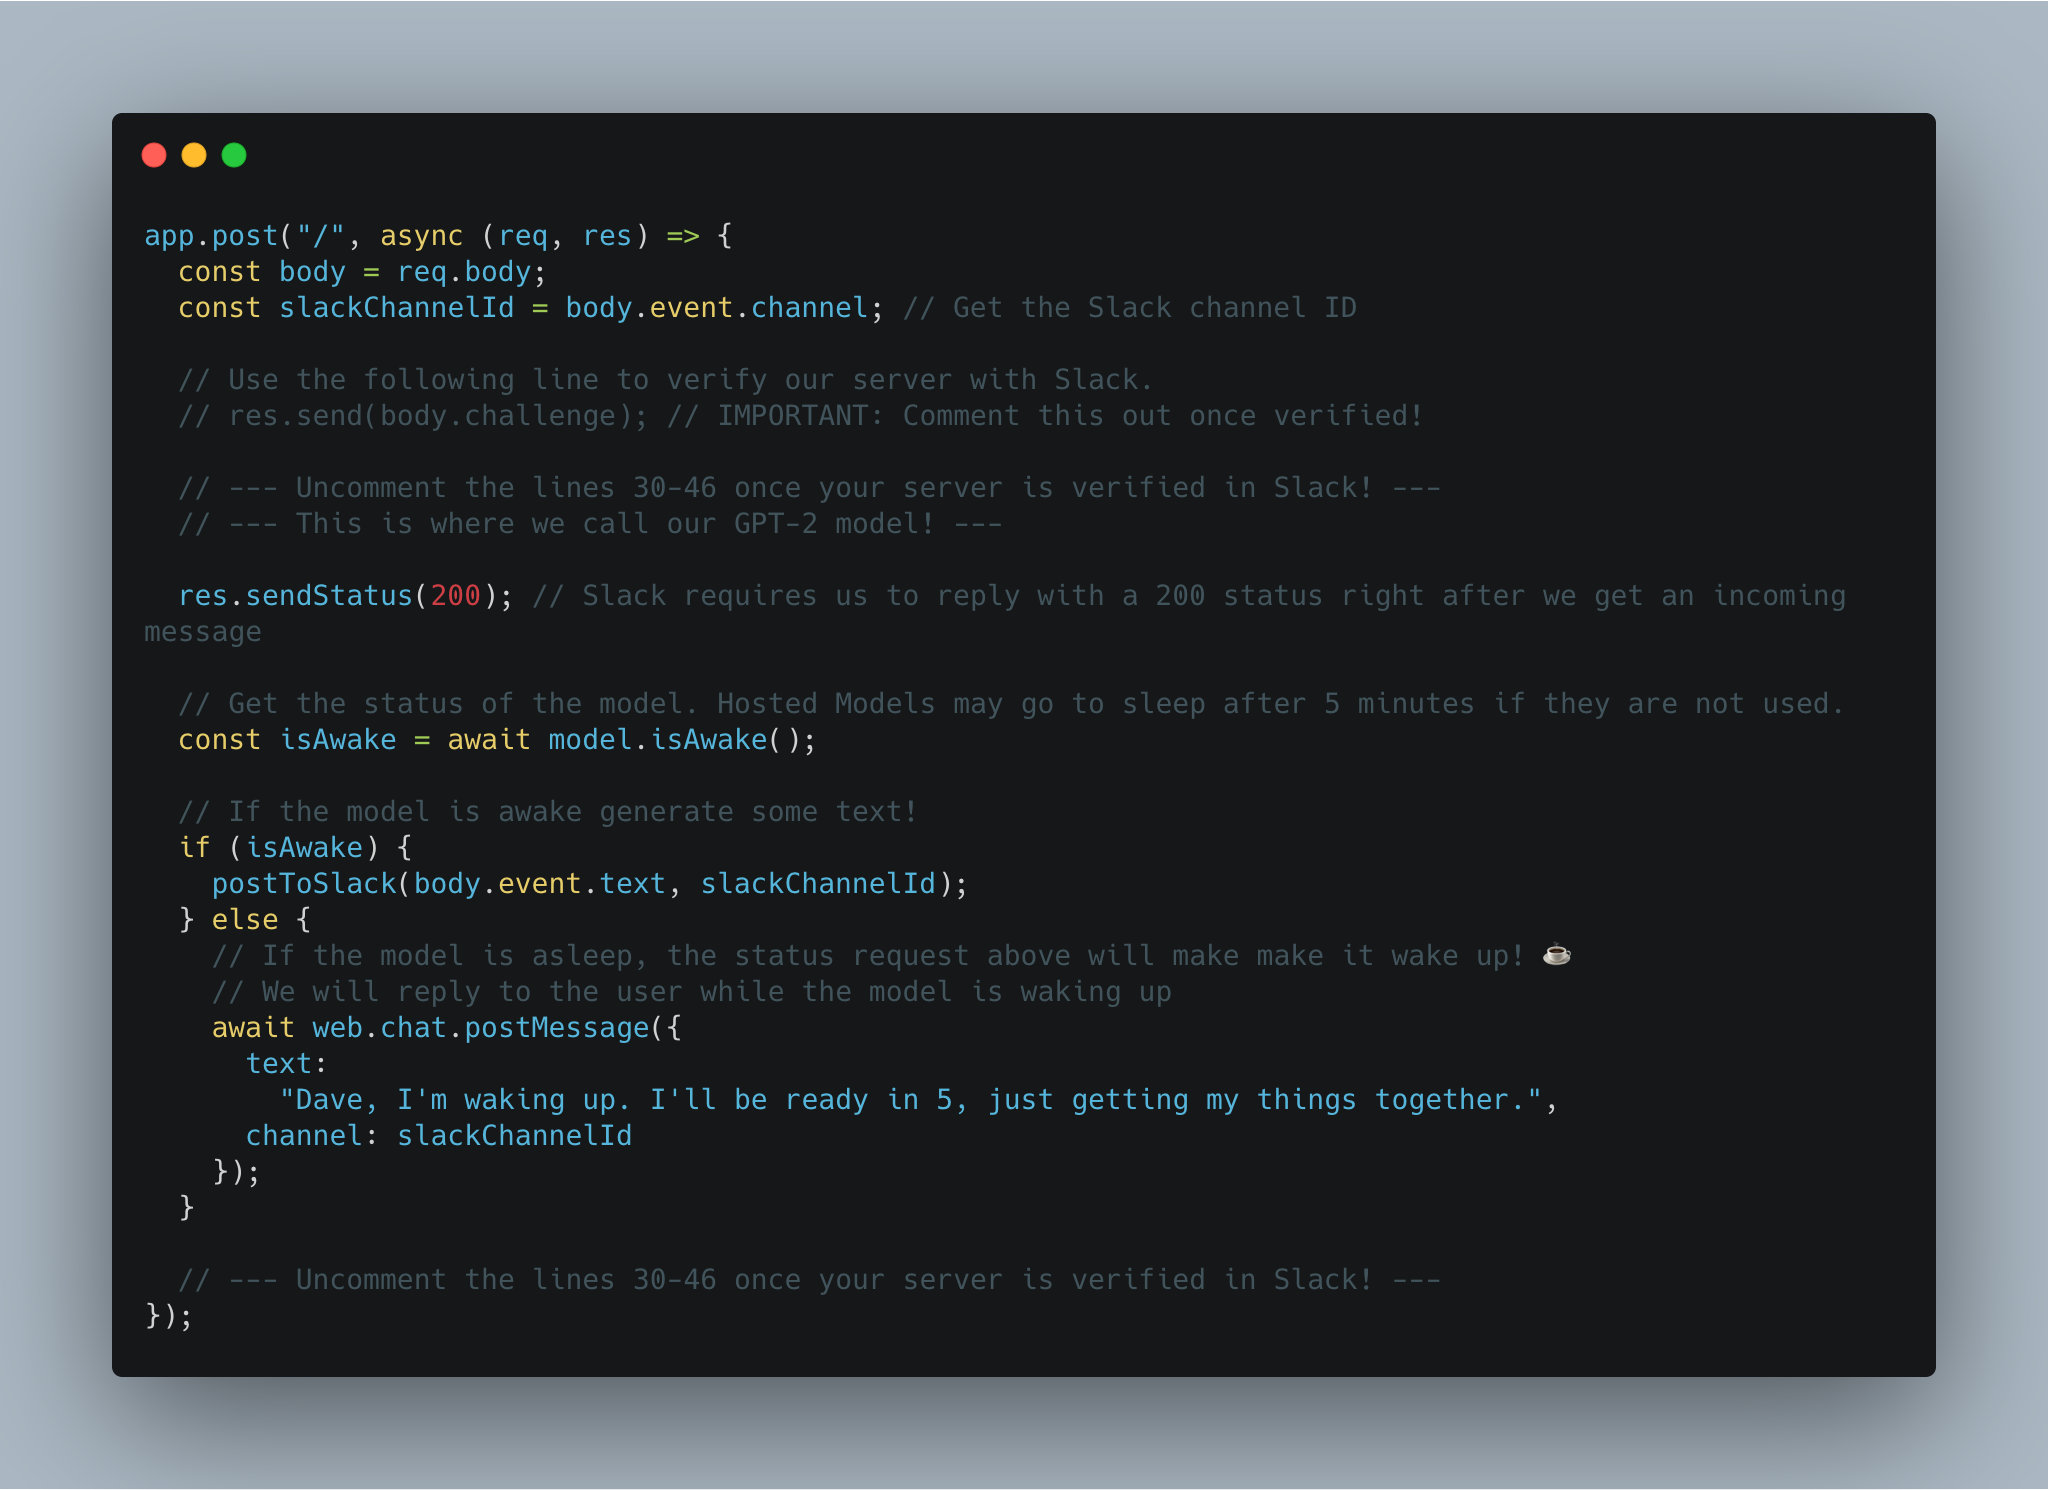
We are almost there! Our last step is to comment out the verification process in our server code and trigger a request to the model every time someone mentions our Bot in Slack. To do this, head to Glitch and edit the server.js file. You’ll just need to comment line 24:
We are ready to test it! Head to Slack and mention your new Bot, followed by a sentence, question, or prompt.
That’s it! We now have our own custom language generation model, trained on your own data, and available in the form of a Bot via Slack! 💥
Experiment with training a model on new data. Perhaps previous Slack conversations? Customer support tickets? Latin American literature?
Resources
- Download Runway
- Glitch Server
- RunwayML Hosted Models SDK
- GitHub Code
- Hosted Models Docs
- Hosted models Pricing
🌈
Thanks to Brannon Dorsey.